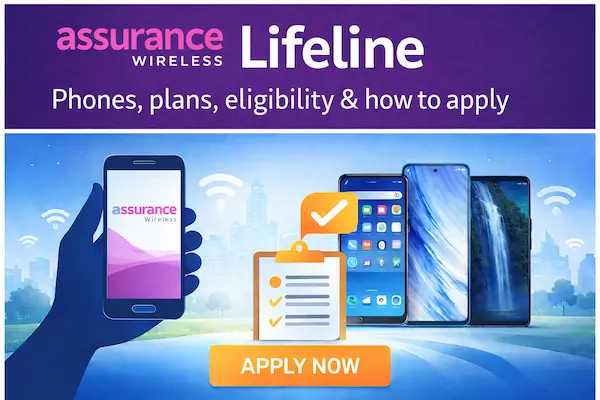
Assurance Wireless Lifeline – Phones, plans, eligibility & how to apply
Learn Assurance Wireless Lifeline plans, BYOP options, eligibility, National Verifier steps, customer support, and how to apply.
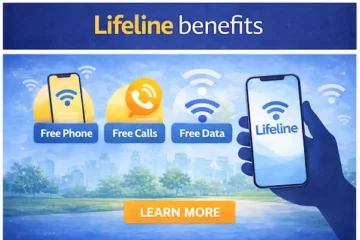
Assurance Wireless Lifeline: what it is and how it works
Assurance Wireless Lifeline is a Lifeline-supported wireless plan offered to eligible households, designed to reduce the cost of essential phone service.
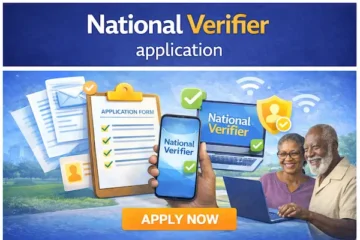
Lifeline is a federal program, and eligibility is determined through a centralized system called the National Verifier, which is managed by USAC.
Once you’re approved, you enroll with a participating provider, such as Assurance Wireless, to actually receive service.
One rule matters more than anything else when you apply.
You can only have one Lifeline benefit per household at a time.
That’s why applications can be denied when a household already has an active Lifeline line.
Another rule is easy to overlook, but it can affect your service.
If your Lifeline service is free, you must use it at least once every 30 days to keep it active, or you may receive a notice and risk disconnection for non-usage.
Independence notice:
This content is informational only.
We are not affiliated with, sponsored by, or in control of Assurance Wireless, T-Mobile, the FCC, USAC, Lifeline, or any third party mentioned.
Program rules, plan features, and availability can change by state and over time, so always verify details with official program resources and the provider’s current disclosures.
Assurance Wireless Lifeline plans: what you get in 2026
Assurance Wireless states that its Lifeline plan includes unlimited talk, unlimited text, and a set amount of monthly high-speed data, with benefits that can vary by state.
According to Assurance Wireless, most states’ Lifeline plans include 10GB of data, plus unlimited talk and text.
Assurance Wireless also lists an enhanced California LifeLine plan that includes 12GB of data, plus unlimited talk and text.
The easiest way to think about this is “ZIP code decides.”
You might see different plan details based on where you live, because state programs and provider offers can differ.
So you want to trust what the enrollment flow shows for your ZIP code, not what a random screenshot shows for someone else.
| Location | What Assurance Wireless lists | What you should confirm during signup |
|---|---|---|
| Most states (non-CA) | Unlimited talk, unlimited text, 10GB data | Data terms, hotspot rules, and coverage in your area |
| California | Unlimited talk, unlimited text, 12GB data | California-specific plan disclosures and renewal notices |
One quick reality check will save you frustration.
Many wireless plans use language like “unlimited,” but still include high-speed data amounts that can slow down after you reach certain thresholds.
That’s why you should read the plan details shown during enrollment and keep a screenshot for your records.
Assurance Wireless Lifeline phones: free phone, BYOP, and what to expect
Assurance Wireless heavily promotes Bring Your Own Phone, which means you can use the phone you already like if it’s compatible and unlocked.
This is usually the fastest route because you’re not waiting on device inventory.
You complete approval, receive SIM instructions or a SIM kit, and then activate service on your existing phone.
Phone availability can be confusing, so let’s make it plain.
Some Lifeline providers offer free entry-level phones in certain areas, while others focus on BYOP and offer devices for purchase.
Assurance Wireless maintains a phone shop experience through an authorized dealer for compatible phone purchases, which is helpful if you need a replacement device.
Here’s the smart way to decide.
If you already have a working smartphone, BYOP is usually your best move.
If you don’t, you should confirm device options shown during signup, or plan on purchasing a compatible phone if needed.
| Option | What it means | Best for you if… |
|---|---|---|
| BYOP | You use your own unlocked compatible phone | You want speed, control, and fewer surprises |
| SIM-based activation | You activate by inserting a SIM or following activation steps | You’re comfortable setting up your phone in minutes |
| Buy a compatible phone | You purchase a device that works on the network | You need a phone and want a straightforward replacement |
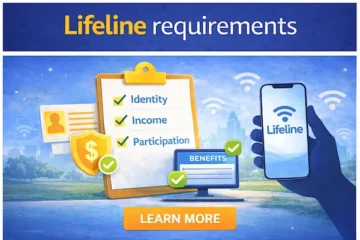
Assurance Wireless Lifeline eligibility: how you qualify
You typically qualify for Assurance Wireless Lifeline the same way you qualify for Lifeline anywhere, either by income or by participation in qualifying assistance programs.
The official Lifeline consumer guidance explains that you may qualify based on your income level or participation in certain government assistance programs.
The National Verifier then checks your information against available databases, and if it cannot confirm automatically, you may need to upload proof documents.
That’s why eligibility feels “instant” for some people and “pending” for others.
It often depends on whether your records match clearly in the databases used for verification.
When they don’t, it’s not a judgment, it’s simply a request for proof.
One detail can make or break your approval.
Your legal name and address must match across your application and documents.
If your proof says “Apt 2B,” don’t type “Unit 2B,” unless that’s exactly how your official mail formats it.
How to apply for Assurance Wireless Lifeline step by step
The cleanest way to apply is to start with Assurance Wireless enrollment for your ZIP code, then complete verification through the official Lifeline process.
Assurance Wireless explains that the FCC uses a National Lifeline Eligibility Verifier to review eligibility, and USAC’s National Verifier page confirms it is Lifeline’s centralized application system.
Use this step-by-step flow, and you’ll avoid most mistakes people make.
- Check availability with your ZIP code.
You want to confirm Assurance Wireless service is offered in your area before you spend time uploading documents.
- Choose your qualification path.
Pick income-based eligibility or program-based eligibility, depending on what’s easiest for you to prove.
- Enter your information carefully.
Use your legal name, your full address, and consistent formatting across all fields.
- Provide documents if requested.
If the system cannot verify you automatically, upload readable images that show full pages, dates, and required details.
- Watch for approval status updates.
If you are asked to re-upload, assume it is a clarity issue and submit a cleaner copy.
- Activate service on your phone.
Follow the activation instructions provided after approval, and confirm talk, text, and data work as expected.
If you want the fastest approvals, this one habit helps.
Take your document photos in bright light, avoid glare, and make sure every corner of the page is visible.
Blurry uploads are one of the most common reasons applications get delayed.
National Verifier and Assurance Wireless: what the system is doing
The National Verifier exists to confirm eligibility and protect the “one benefit per household” rule.
USAC explains that the National Verifier checks consumer information automatically against databases when an application is submitted.
If the system cannot find a match, it gives you a path to provide additional information for verification.
This is why you should never pay someone to “guarantee” approval.
Approval is based on eligibility rules and verification, not on a shortcut or a fee.
If someone promises guaranteed approval, treat that as a serious red flag.
Assurance Wireless customer service: the number you should save
If you need help with an application, activation, or account issue, Assurance Wireless lists Customer Care at 1-888-321-5880.
Assurance Wireless also lists support hours as Monday through Sunday, 7 a.m. to 7 p.m. CT on its help center contact page.
Here’s how to get better help faster when you call.
Have your phone number or account email ready.
Know your ZIP code and the exact status message you’re seeing.
If the issue is activation, keep your SIM details and phone model nearby.
That preparation turns a 20-minute call into a 5-minute fix.
You’re not telling a long story.
You’re giving the agent exactly what they need to resolve the problem.
Assurance Wireless Lifeline non-usage rule: how to keep your service active
If your Lifeline service is free, you must use it at least once every 30 days, or you may be at risk of losing the benefit for non-usage.
Lifeline Support’s program rules explain that if you don’t use it, you will receive a notice and must use the service within the cure period to avoid shutoff.
The easiest way to protect yourself is to build a tiny habit.
Make one short call, send one text, or use a small amount of data off Wi-Fi at least once a month.
Then you don’t have to worry about the clock.
Quick tip:
Set a monthly reminder to send a text or make a short call, especially if you mainly use Wi-Fi.
Assurance Wireless Lifeline: common mistakes that delay approval
Most delays happen for simple reasons, and you can avoid them before you even hit submit.
Think of these as the “don’t step on the rake” moments.
- Name mismatch between your application and your proof document.
- Address mismatch, especially missing apartment numbers or inconsistent formatting.
- Blurry or cropped uploads that hide dates, program names, or required details.
- Using unofficial third-party sites that confuse the process or request unnecessary sensitive data.
- Assuming approval equals activation, and forgetting to complete the provider enrollment and activation step.
If you fix these issues upfront, you dramatically increase your chances of a smooth enrollment.
You also reduce the odds that you’ll have to re-upload documents multiple times.
Assurance Wireless Lifeline checklist: apply with confidence
If you want a simple checklist that keeps you calm, use this right before you apply.
- You confirmed service availability with your ZIP code.
- Know whether you qualify by income or program participation.
- Have a readable photo ID ready, if requested.
- Have clear proof of eligibility or income, with full pages visible.
- Your name and address match across documents and your application.
- Phone is unlocked and compatible if you plan to use BYOP.
- You set a reminder to use the service monthly to avoid non-usage issues.
If you follow that list, the process stops feeling like a confusing “government phone” rumor.
It starts feeling like what it really is.
A straightforward eligibility check, followed by a normal activation step that gets you connected.